I’ve been baking my mother-in-law’s wonderful recipe for lavash for over 35 years. It’s very different from the thin, wrap-able lavash most are familiar with. Because it’s time-consuming and requires a fair amount of oven time, summertime is not the best time for me to make it. So, I decided not to make it.
 |
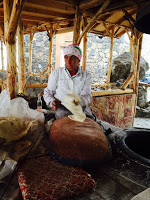
| Cook #2 next to tonir |
 |
| Lavash cook #1 in Armenia |
To make authentic, old-world lavash, one would need a tonir (an in-ground clay oven), a hot fire, a cooking partner, and a lot of patience. Nope, not going to happen!
‘Stovetop Lavash’ that I’d never before made.
After having
seen authentic lavash being made from scratch in Armenia, I knew this
preparation would be better handled with another pair of hands, so my plan was
to make this when my daughter came to visit, but time did not permit.
to a minimum.
 |
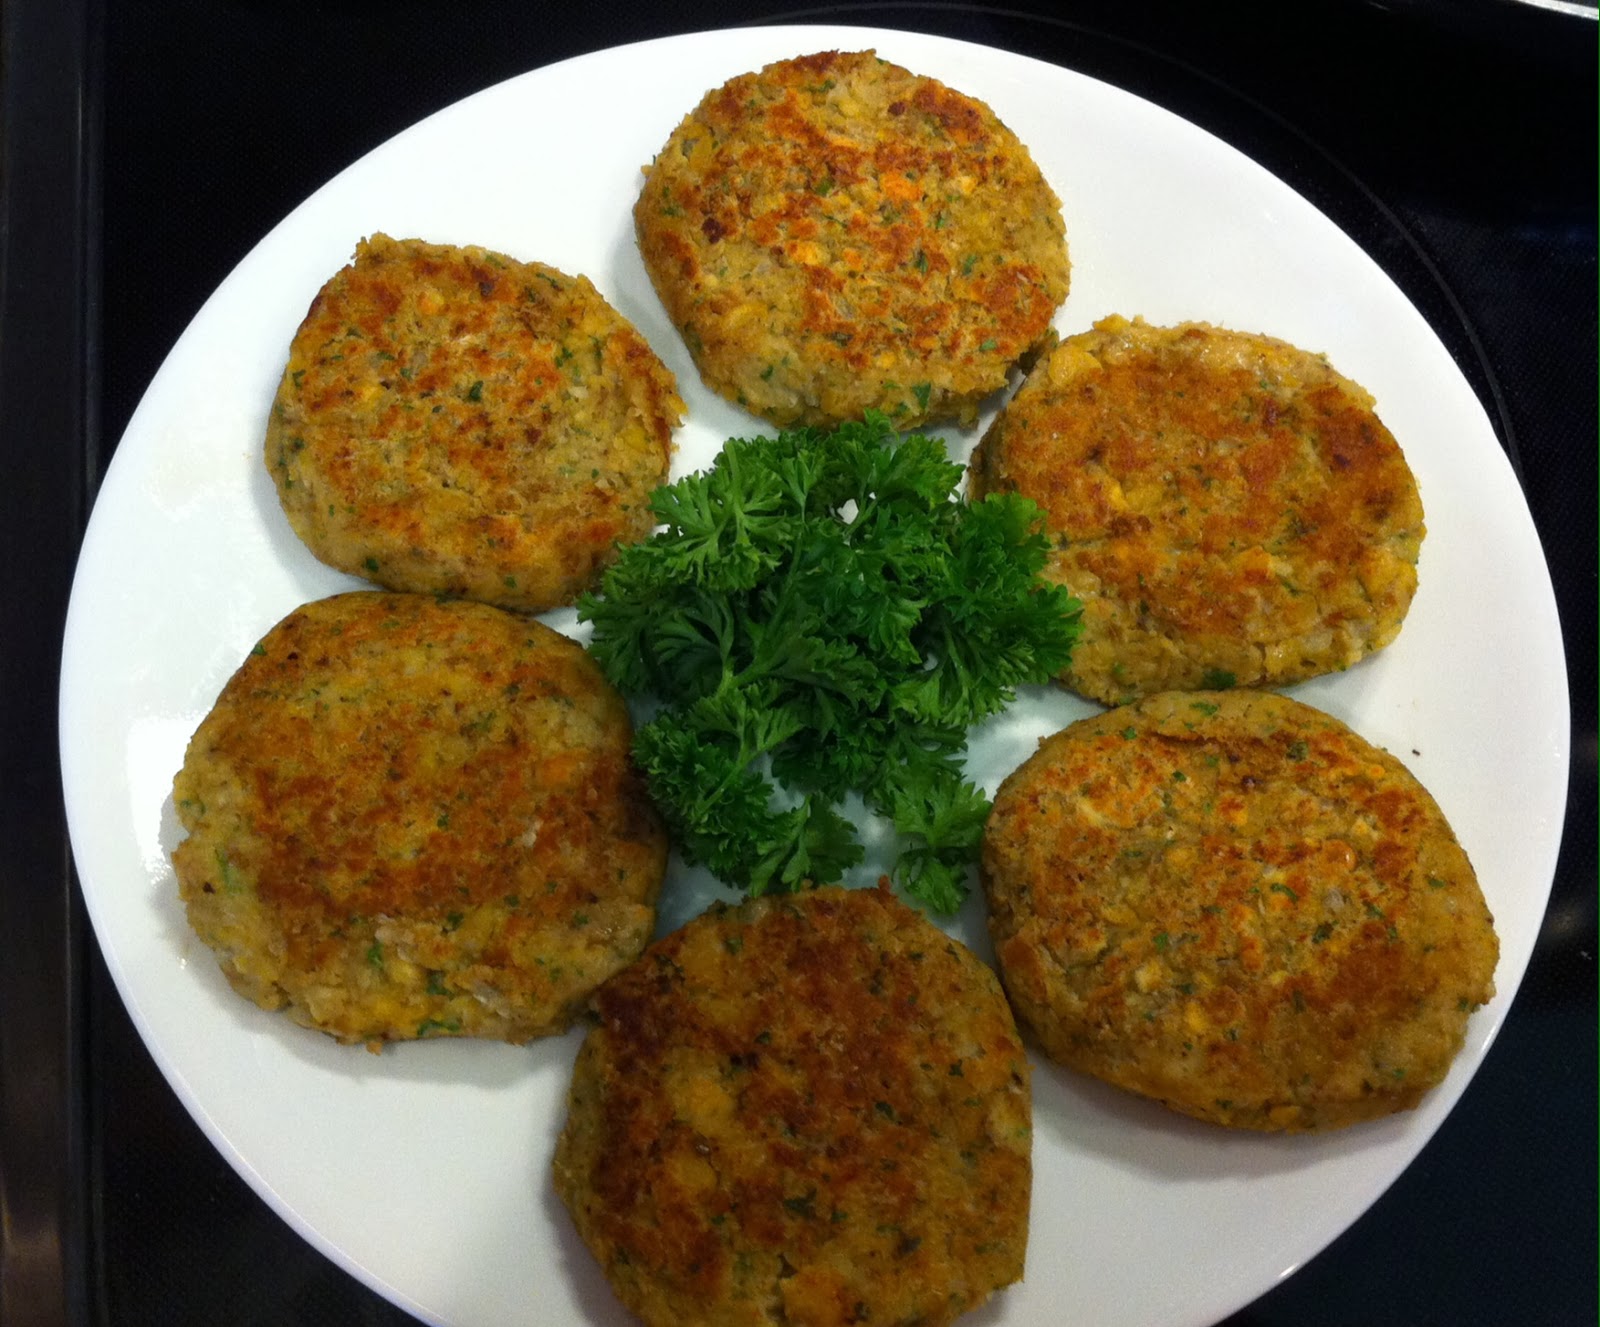
| Homemade Stovetop Lavash |
Homemade
Stovetop Lavash
cups all-purpose flour can be used instead)
Directions:
 |
| Step #1 1. In a mixing bowl, whisk together flour(s) and salt, until well-combined. |
of the water, while mixing with a wooden spoon, until
dough is too dry, continue to slowly add some of the remaining ¼ cup water
until a non-sticky dough is formed.
 |
| Step #2 |
2. On a
lightly floured work surface, knead the dough until it is smooth.
Divide the
dough into 8 equal-sized pieces; roll each piece into a ball.
 |
| Step #3 |
3. Continuing
to work on a lightly floured work surface, roll each ball,
one at a time, into
a very thin circle measuring about 8 – 9 inches
in diameter. (As you may have noticed, mine turned out more ‘rustic’
in shape than circular!)
 |
| Step #4 |
4. Place
an ungreased, 12-inch, non-stick skillet on a large burner set to
high heat. Carefully
transfer one rolled dough sheet at a time in the
heated pan.
transfer the rolled piece of dough to the skillet, carefully drape
it over the
rolling pin and lay it into the hot pan.
 |
| Step #5 |
5. Cook for
about 1 minute while gently shaking the pan to prevent the
lavash from burning.
Flip it onto the other side and cook, shaking the
pan, for one more minute.
Place on a cooling rack. (This is where having
a second pair of hands really helps!)
the process until all pieces have been rolled out, cooked and completely cooled.
roll the dough, be very careful, as it can easily tear. The final product
looked and tasted like lavash, but the texture seemed a bit chewy. Perhaps, if
I’d used only all-purpose flour, that might have made a difference.
cooled lavash should be lightly spritzed or sprinkled with water on both sides.
(Using a bottle with a spray nozzle works nicely as long as you don’t get the
lavash too wet.) Stack the pieces with either parchment or paper towel placed in
between. Lightly cover the stack in plastic wrap for about an hour.
the parchment or paper towel pieces. If the lavash pieces are large, fold each in half or into quarters; individually wrap the folded pieces in plastic, and place in freezer bags. Freeze until needed.
ready to serve: Remove as many pieces as you need from the
freezer. Thaw at room temperature for about 30 minutes while still wrapped.
suggestions: Cut into smaller pieces as part of a mezza
platter, or use as a wrap for kebabs, cheese etc.
I will try this!
When you try this, I'd like to hear your thoughts!
Hey Robyn, one way of storing the lavash that I saw done in Armenia is to let it dry out, then stack it in a ventilated location away from pests. When you want to use it, you sprinkle with water,let it soften a bit, roll it in a towel to let it finish softening, and voila! Though I have to say that the freezer method is a lot more economical in terms of space.
You're right, Ara. That's been a tried-and-true technique for ages by our elders. Thanks for mentioning it!
Awesome recipe, made it for the first time. Thank You, I'm trying to learn some dishes so I can prepare them for my relatives when they come in January.